Mountain Bike First Aid Basics: Part 2 Orthopedic Injuries and Backcountry Splinting
Orthopedic injuries are some of the more common injuries sustained while on your mountain bike.
Fractures, dislocations and soft tissue injuries like sprains and strains make up the majority of these. Identifying a serious fracture or dislocation may or may not be easy, but one of the most important things to do is immobilize it using a splint.
A splint can come in many forms, which we’ll talk about, but the most important aspects of the splint need to be discussed first. First we’ll talk about evaluating the injured area and then how to build a solid splint to protect and prevent any further injury or pain. We’re not going to get into the dirty details of wound care or complex reductions here; those require a bit more training.
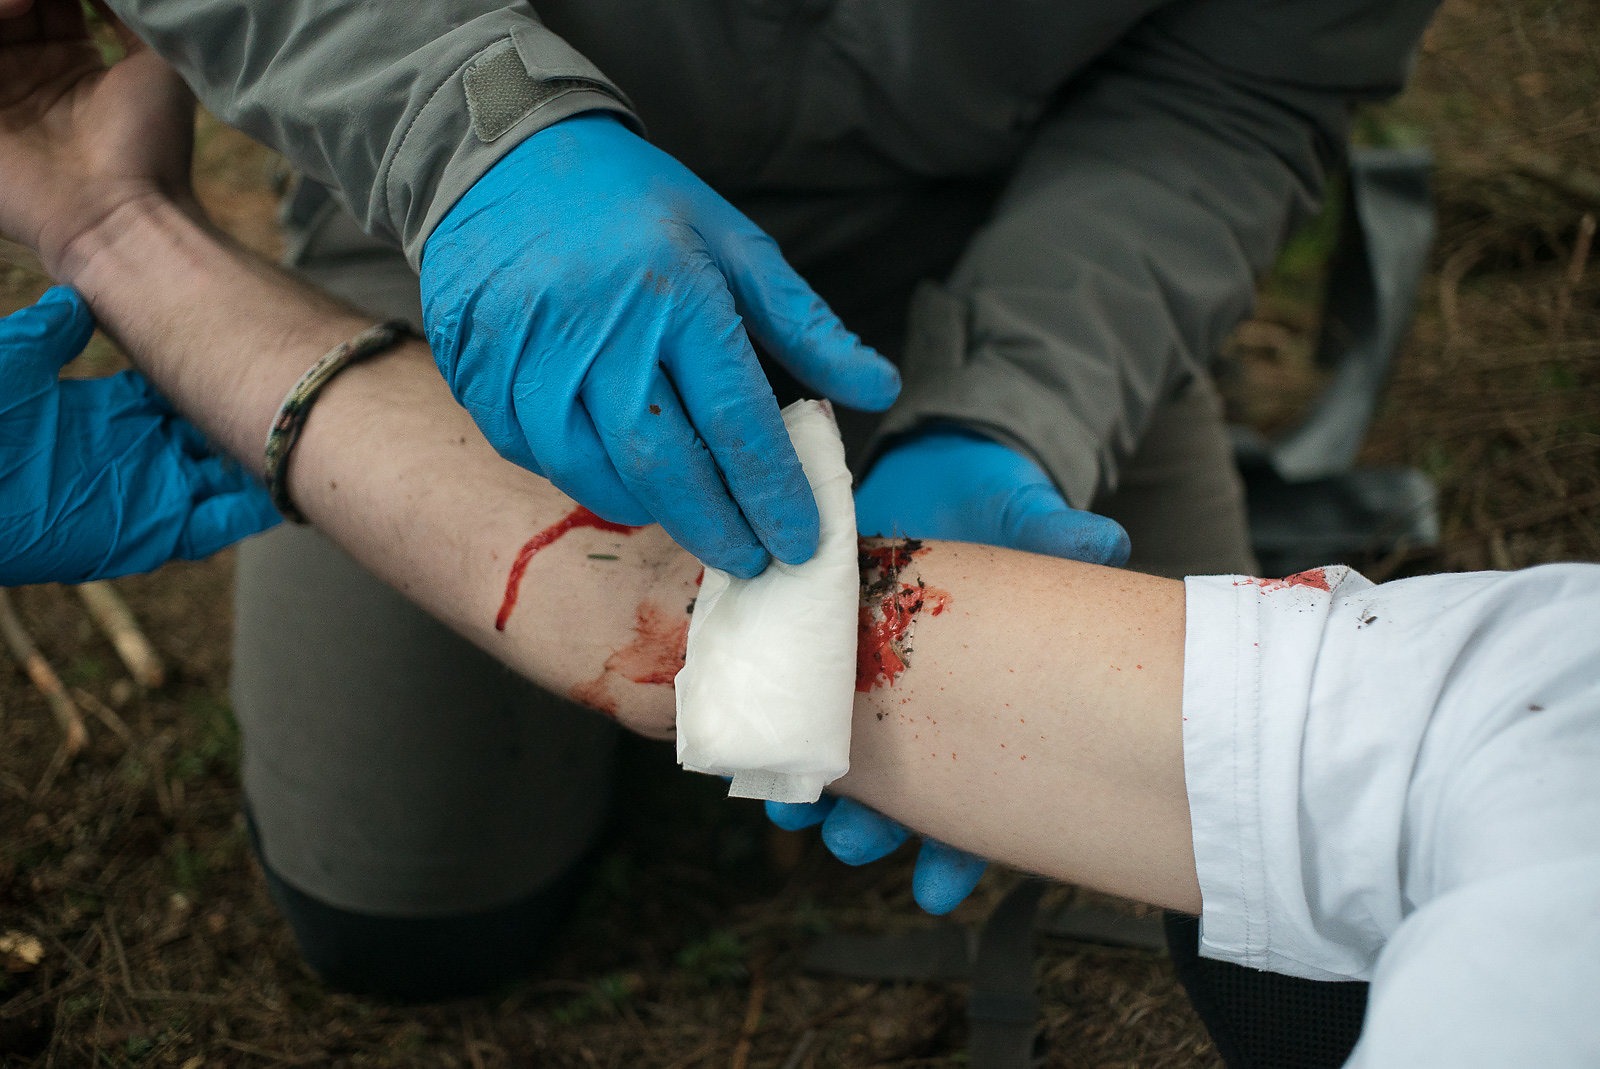
A basic musculoskeletal exam should go something like this: Is there bone sticking out or is there blood? No, good. See below.
If yes, you have a problem. Try and stop the bleeding and call for help.
Is the injured area obviously deformed? No, going well so far. Press on the bones in the area of pain. Be sure to examine the joints above and below the pain also. For example, if you smashed your forearm, then press on the elbow and wrist. Have the patient move those joints in all the normal ranges to be sure you’re not dealing with a bigger injury.
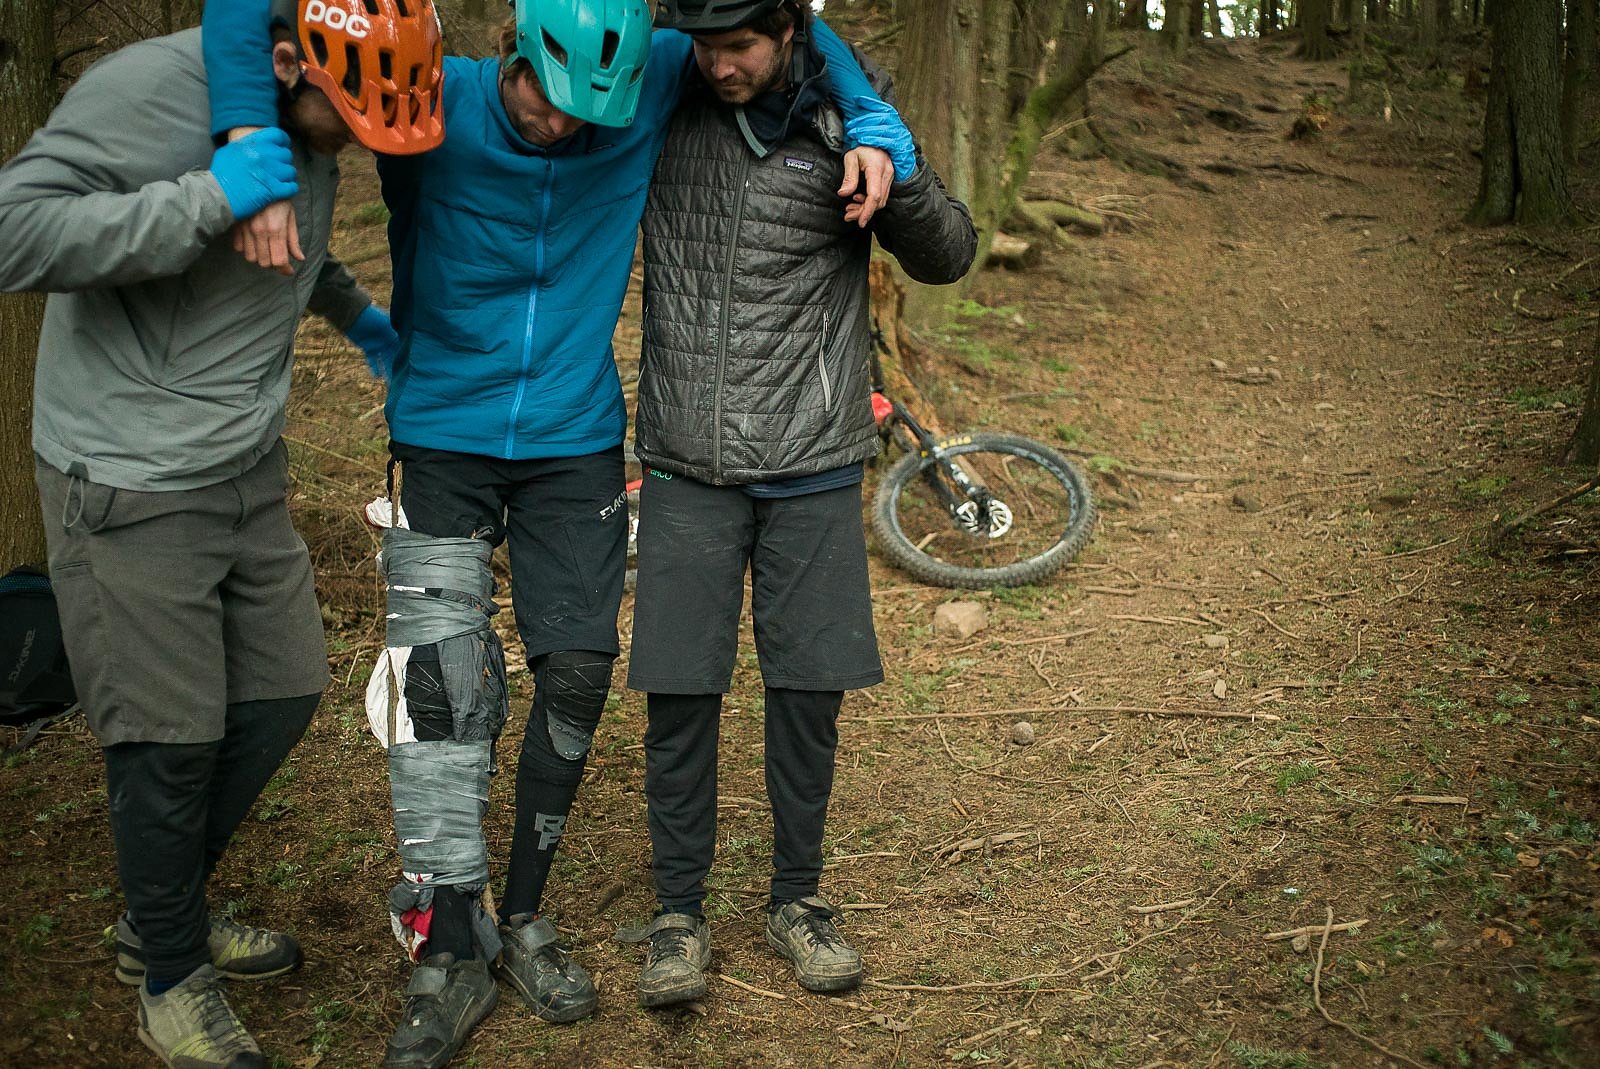
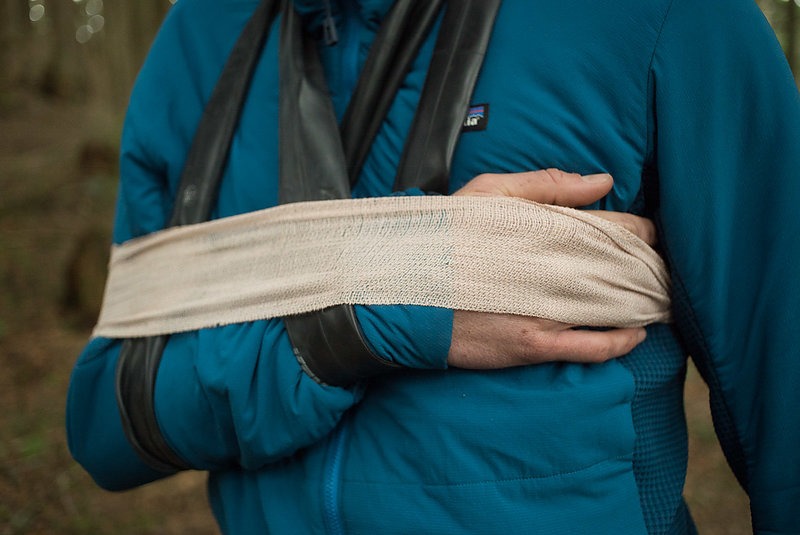
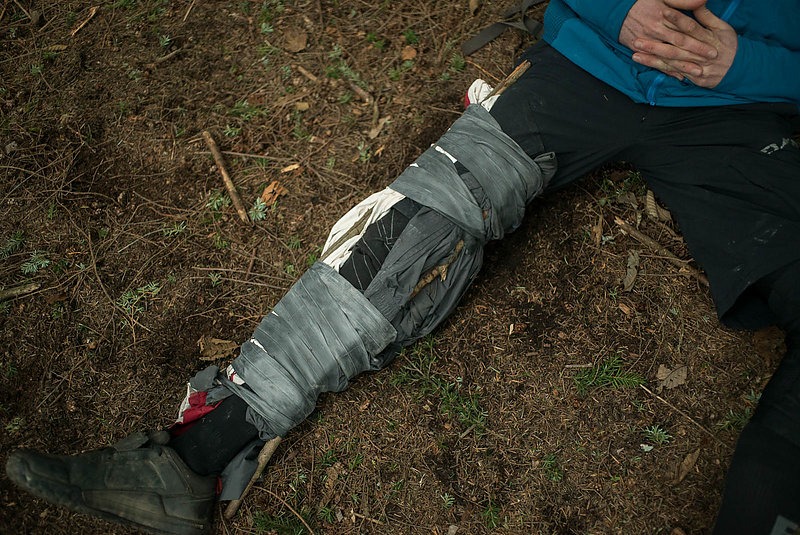
Yes, it’s deformed: you likely have a fracture and/or dislocation. If it’s between a joint, e.g. forearm, you will need a splint to stabilize the joints above and below, in this case, wrist and elbow. (See pictures) If the deformity is around a joint then you may have a dislocation and/or a fracture. If the patient is unable to move the joint at all then you will need to stabilize it as best as possible to limit pain and get them out successfully.
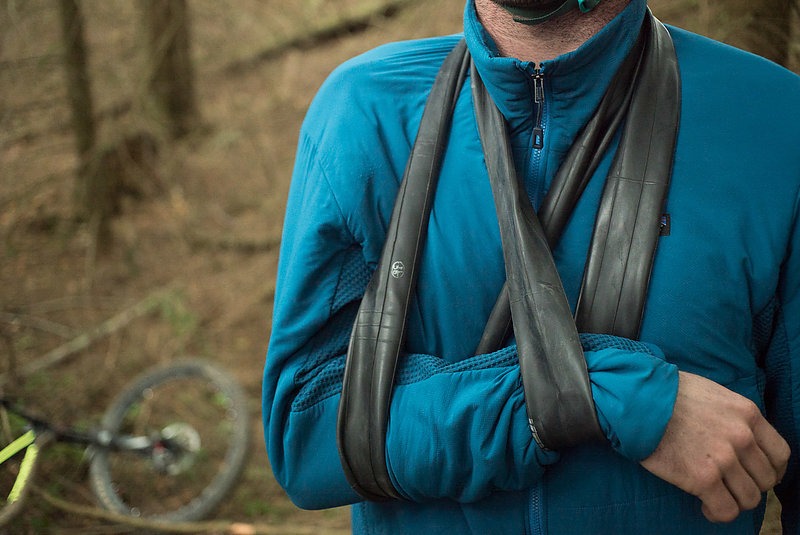
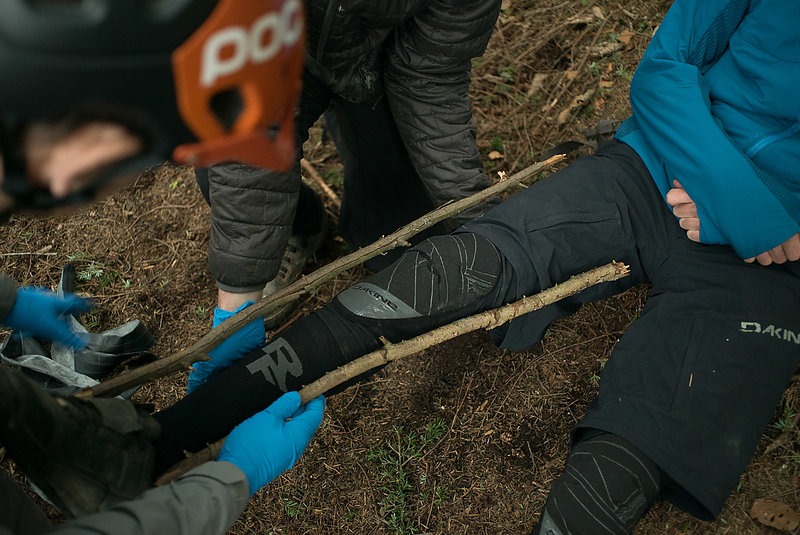
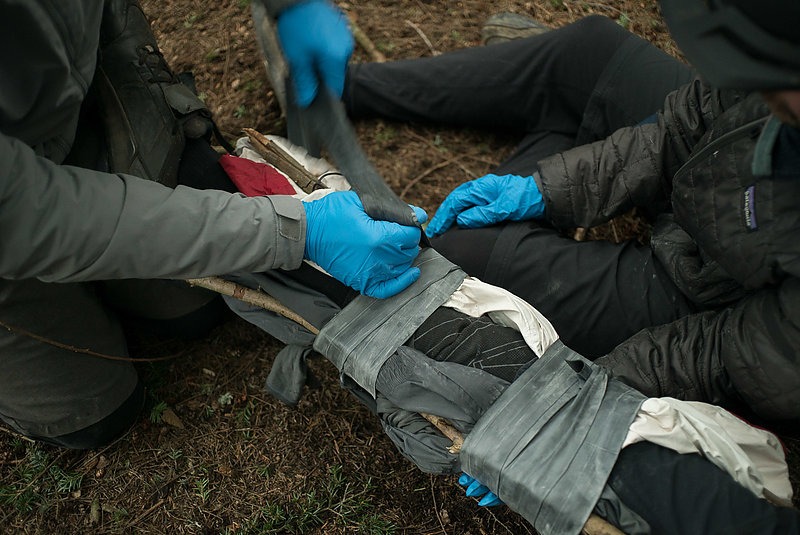
Building a splint in the backcountry isn’t all that difficult. There are 3 main components: 1. Padding, 2. Rigid material, 3. Secure the splint (binders)
1. Padding is one of the best things you can do for a painful injury. Layer up the area with
whatever soft materials you have, puffy coat, moss, t-shirts or other clothing. It protects the area
from pain and further potential injury while filling up the space between the rigid materials and
binders.
2. Rigid materials come next. These are the support pieces of the splint. Some may choose to
carry a SAM splint or similar commercial splint, but otherwise, improvise. Sticks are great as
they’re usually strong, customizable and in abundance.
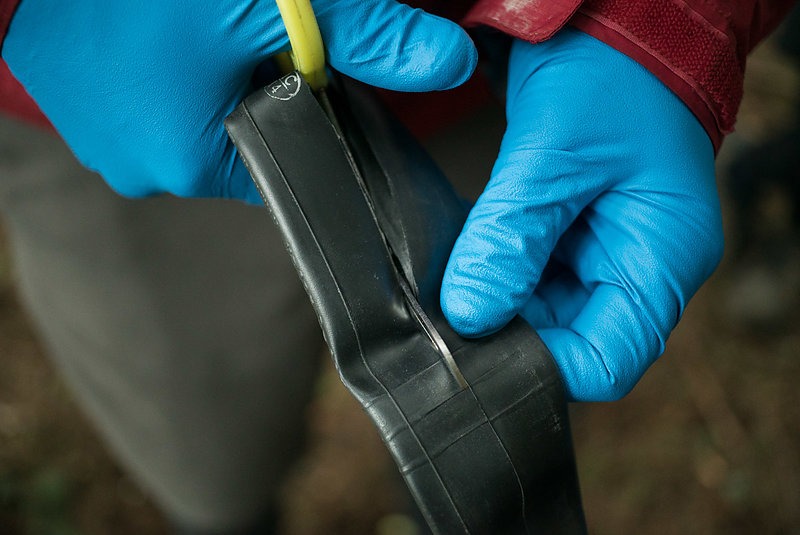
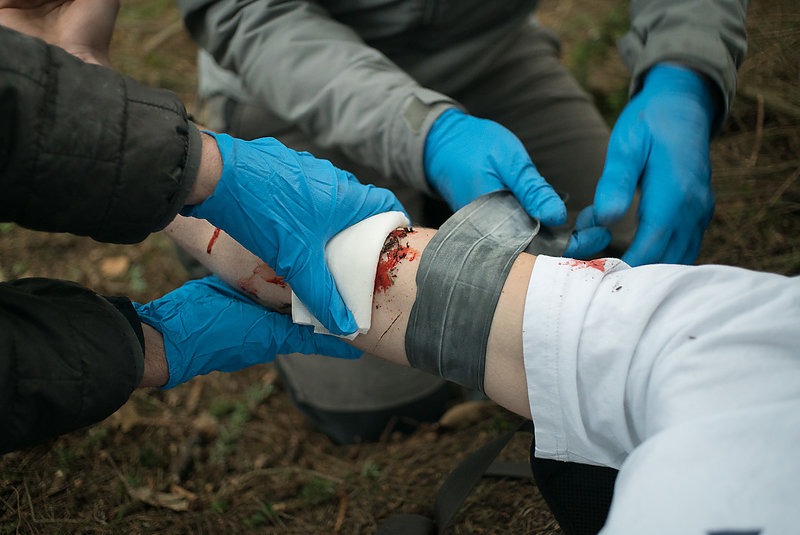
3. To secure the splint, use materials to hold all of the above together. Bike tubes, tape, backpack
straps, ACE wraps, shoelace, belts, clothing. Whatever you have, make sure it’s tight enough to
hold the splint in place until your friend gets to the medics or the hospital.
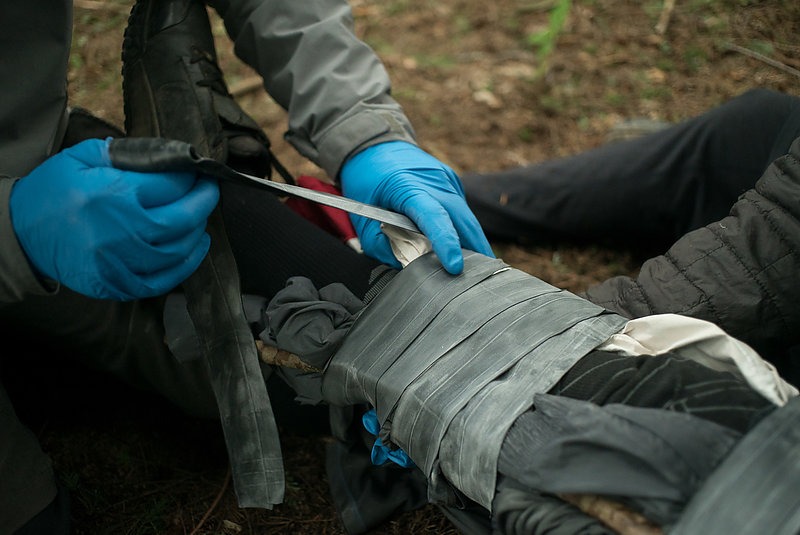
Be sure you build the splint right the first time. You don’t want to have to redo it on your way out. Make it tight and secure, but don’t cut off the circulation.
As with anything, it’s best to try and practice these splints before you actually need to do it in a real life scenario. Hopefully these tips can help prepare you, but by no means does reading this article substitute for formal training. Be sure to sign up for a Wilderness First Aid or Wilderness First Responder course so you’re ready for it all!
This column is brought to you by Backcountry Medical Guides, which offers mountain bike-specific First Aid and Wilderness First Responder classes in Bellingham, WA and Santa Cruz, CA. Check out class dates and availability at www.backcountrymedicalguides.org